After ten thousand and (and 23) years, I’m free! It’s time to conquer Earth!
The Mighty Morphin Power Rangers were a huge part of my elementary school life. I loved the yellow ranger, and I knew I wanted a costume from the show. Instead of being a Ranger though, I decided to create Rita Repulsa. This was my first costume that was more than a simple dress and wig.


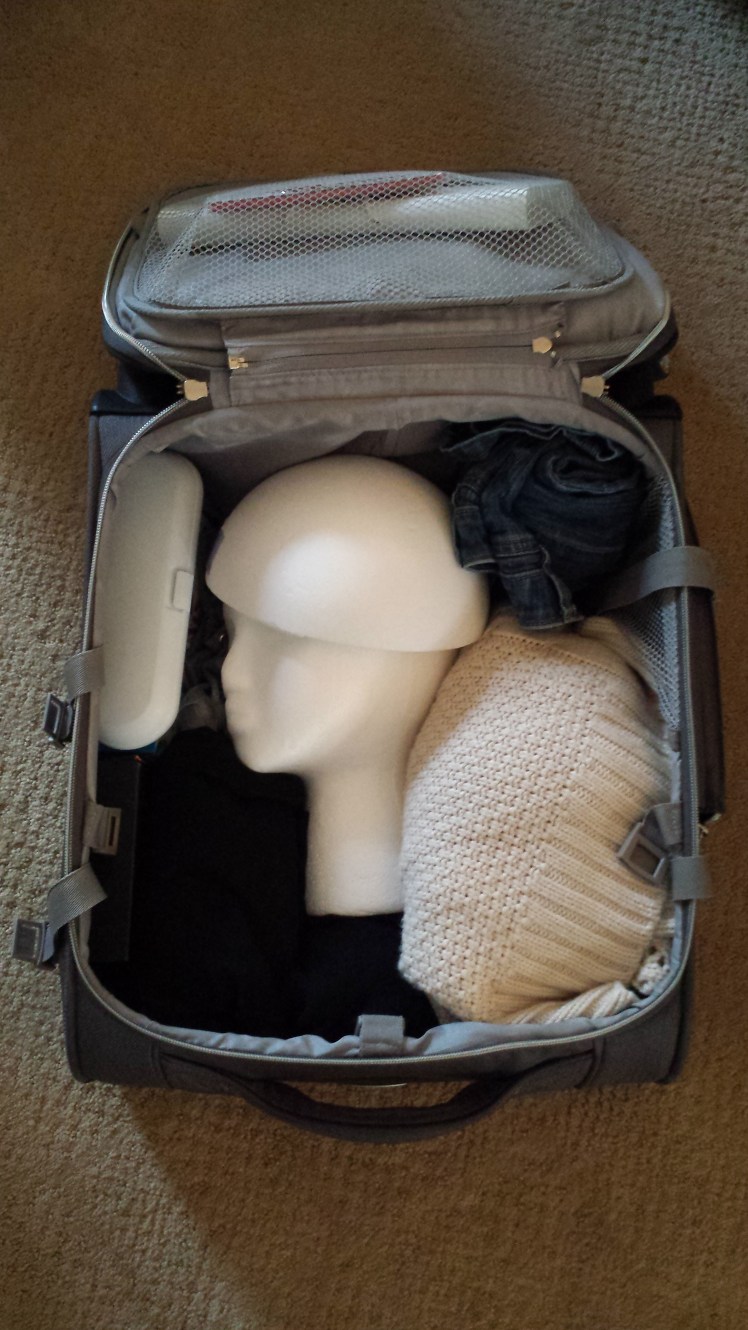
I did most of the work in hotel rooms at night while traveling for work. TSA will sometimes check your sewing machine and foam heads, But you can take your sewing machine as a carry-on, if you’re wondering. Just check the scissors.
The total process took me about 9 months to construct all the pieces, and I had to learn a lot of new techniques to complete it. After wearing it at Dragon*con, I have some adjustments I’d like to make, and then I think it will be perfect.
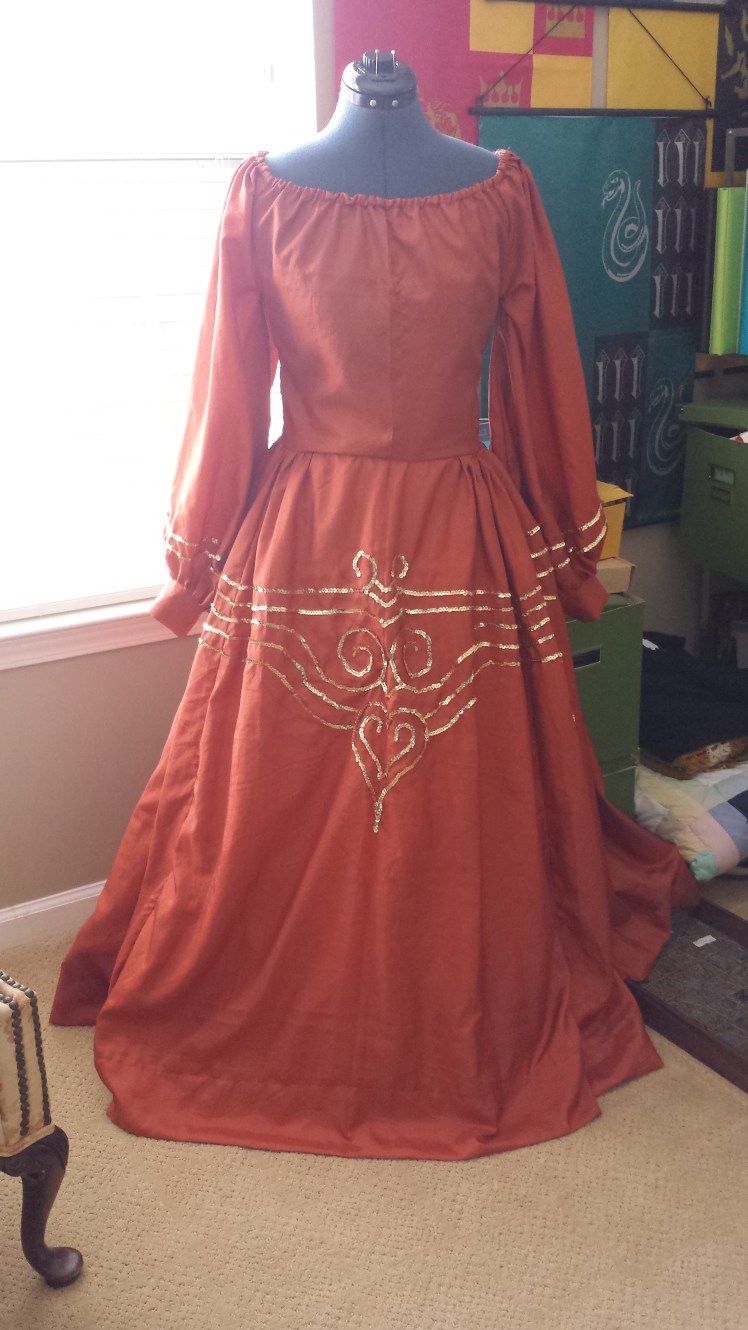
The Dress:
I started with what I knew and created the dress. I used a ball gown pattern for the basic shape with a lot of tweaks to the pattern. I adjusted the pattern for the skirt to be one piece without layers and to have a train. The main change to the pattern was creating long bishop sleeves with a cuff. I traced the pattern onto tracing paper and extended the length and cut long strips in order to fan out the shape.

The most difficult part was adding the sequin design to the front of the dress and sleeves. I watched and re-watched hours of the show trying to get the pattern just right, and laying it out on the fabric.
Vest and Chest Piece:
The vest is what still needs the most work. I created a pleather vest and velcroed the chest piece onto it. However, my body heat caused the glue to fail. I plan on replacing the vest with one thermoplastic piece with the cones permanently attached for next year.
I created the Madonna cones out of worbla, styrofoam and craft foam. The details are additional layers of worbla. Automotive filler primer evened out the surface. I painted it black and did all the details in gold paint.


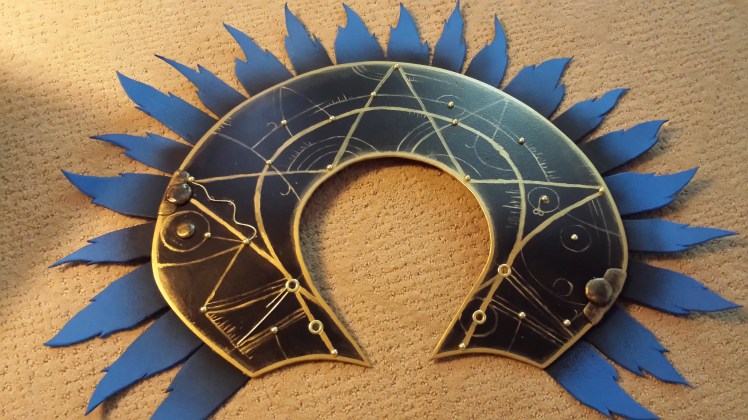
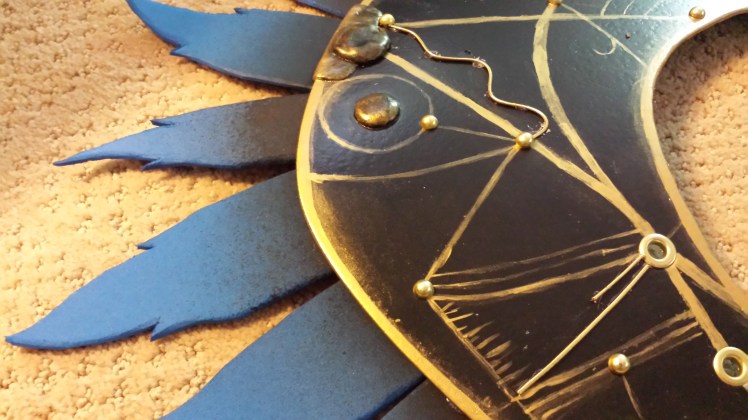
Collar:
The collar is made from trovicel plastic. The feathers are craft foam with the bases painted black using PlastiDip. I used eyelets to connect the collar to the vest and used the ribbon as part of the pattern. Little gold studs, ribbon, worbla globs, and paint decorate the top.
The Feather Bustle:
This is one of my favorite parts. I used a white fanny pack with the strap removed, and velcroed it to the back of the dress. This velcro is sewed onto the dress and pack, so there was no glue to fail. I used a hot knife to cut long strips of a sheer white fabric and sewed them together in groups to cover the faces of the pack. I was able to machine sew some of the groups to the pack, but most were hand stitched. I kept cliff bars and fruit snacks handy, as well as super glue and extra batteries.
The Wig and Crown:
I built the foam structure using a hollow half sphere and two large cones attached together. I used styrofoam glue and reinforced it with pins and wrapped it it gray tulle. It’s surprisingly stable.
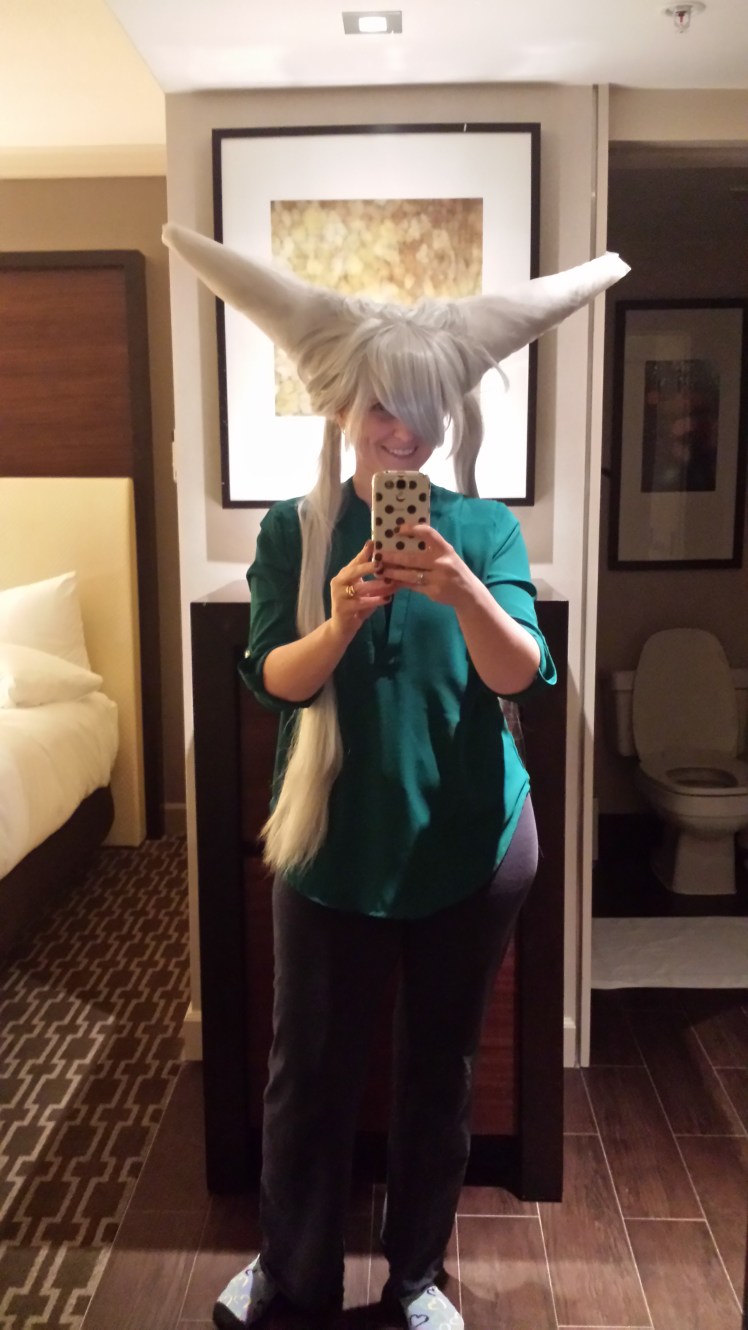
Using two 40 inch gray wigs, I wrapped the hair to cover the cones. In order to cover the cone near the tips, a good deal of the second wig was cut up and glued in place and overlapped to hide the ends. Pins and hairspray weren’t quite enough to hold everything in place, so a lot of hot glue was used.


After the hair was in place, I made a worbla mold of my head to keep it in place when on. It was wrapped in brown fabric and glued to the inside on the half sphere. The edges of the fabric were brought over the wig edge to peak out above the crown.
The crown is made of worbla. I made the raised sections by layering craft foam and pushing the hot worbla into the spaces between. The stones are glass pebbles that have been painted on the bottom side and glued in place. Everything was painted black and accents in gold. This was then glued to the rest of the wig. I then cut pieces of brown fabric and glued in place with the appropriate holes, slits, and knots.


I purchased a black head covering and sewed wig clips inside and Velcro to the top. Velcro was also attached inside the head form to keep everything in place and allow me to remove the wig when necessary.
It was particularly difficult to find good images or shots in the show of her gold straps, so I repeated the few symbols I could make out. I drew the symbols on the gold ribbon with fabric markers and then glued them to the inside of the crown.


Staff/Magic Wand:
Layered EVA foam formed the base of the staff. I created a template in Illustrator and used it to cut the basic shape from the foam. I used a Dremel and sanders to shape the top. After fully shaped, I inserted a curtain rod for the handle, and painted everything with PlastiDip.


The red ball is a clear plastic ornament painted with red fingernail polish on the inside. I glued a string of red LED lights in place and created a pocket within the staff to hold the battery pack. I also strung blue LEDs through the base to light up the blue stones. The blue stones are also glass pebbles painted on both sides.
I inserted a ring between the foam layers and applied worbla around it, and created another worbla ring holder for the top of the chain. After attaching all the stones and red ball, I handpainted the details with gold paint.
I attached the chain and combined beads to create the drop shape bead. Unfortunately, I choose poor jump rings, and both beads went missing from the staff.
Jewelry:
I cheated a little and purchased an assortment of rings. I did, however, create the bracelets. They are worbla shapes with glass pebbles. I used D rings to attach the beads and chain.
Hidden Stuff:
To keep cool, I wore UnderArmor shorts and three quarter length shirt. I also purchased cooling wraps for my neck, ankles, and bra. Which helped a lot, I just had to flip them around occasionally. I wore a petticoat to plump up the skirt, and some hideous slip on shoes for comfort.
I had so much fun wearing it at DragonCon, although it was a bit hot and difficult to navigate through crowds. Sorry to all those who got poked!
I plan to rework the vest and reinforce the staff before next year. The best part though, Alex has agreed to go as Lord Zedd next year!


Graham Helping


Ahhhh OMG this is fabulous and reading this has helped so much! I am working on my own Rita Repulsa costume for Dragoncon 2017! Im trying to make the staff in Photoshop and failing miserably. Do you have the blueprint files you would be willing to share or I could purchase from you? Thanks so much and killer job on this!
LikeLiked by 1 person
Thank you, Heather! Sorry my response is slow, for some reason I didn’t see the comment. If you still need the template, I would be happy to send it to you. You can email me directly, and I’ll send it over. Be warned, it’s a pretty rough Illustrator file. I can’t wait to see your costume at Dragoncon this year, I’ve made some updates and will be wearing mine too!!
LikeLike
This is really well done. I love it. I have been working on my Rita cosplay for a few months now and was having issues trying to do the bottom design on the breast plate and the symbols on the gold ribbon on the head price. Was seeking more references and stumbled on your page. Thanks so much for the inspiration. 🙂
Right now I am struggling with the wig on my head price ugh! Did you end up cutting the wig into strips and gluing them on? Because I am about to that point lol nothing else is giving me the results I am looking for
Again, well done! 😍😍😍 and thank you for taking time for the write up! That was amazing of you. Gave me some ideas to work with and helped a lot.
-Krista
LikeLiked by 1 person
Thank you so much, Krista! I ended up using 2 whole wigs. The first one I cut two holes for the cones to poke through. With that wig I tried to cover as much of the cones as possible (I’ve got a photo of the headpiece before the second cut up wig was added that I just added to the post so this makes more sense). A large portion of the hair went straight to the tip of the cones and several sections criss-crossed around. The second wig I cut up and glued strategically in place so it looked like it was spiraling around. A lot of hot glue and painful fingertips. Hopefully that helps. It was a bit of trial and error, but that’s how I got it to work for me.
LikeLike
Oh wow thanks so much for the prompt reply! 🙂
I have done the cut holes for cone method as well so maybe I just need to work a bit more around this method then. Hehe I love the idea of adding tulle first so I am totally stealing that idea of yours ! 😉 I got super flustered with the wigs before and just have been pushing the head price aside. Now here we are two weeks from con and overwhelmed ha! You know the struggle 😀 thanks again for taking time out to answer my question and for the advise! Very kind of you.
I started my wand with the Eva foam but half build I switched to foam installation sheet. Much lighter. Now to get the worbla right. Lol this is actually my first big build. All the rest prior were just sewn costumes and such so this is scary but exciting at the same time hehe 😂
LikeLike
No problem!!! And yes, I know the struggle. I actually had stress dreams about not finishing it last year. It was also my first big project too! Before I had also only sewn dresses and simple wigs.
I finally started my husband’s Lord Zedd, and I’m going to take your advice about the installation foam for his staff. My shoulder was so sore after carrying mine around.
Let me know if want clarification on any of the other parts, I’m happy to go into more detail!
Thanks for reading, and good luck with your build!!!
LikeLike
Hihi!! Thanks again for your help! I wanted to share some progress photos and completely forgot!
can peek here : https://www.facebook.com/krista.holewinske/media_set?set=a.10159013759560707&type=3
I just dont have any pictures of it all together on there yet tho =/ Soon!
LikeLike
YOUR STAFF LOOKS AMAZING! I cant wait to see the finished product!!!
LikeLike
Hi! I´m from Brazil! I loved your diy tutorial.
Can you send me the template of the magic wand to print?
Thanks in advance.
Kisses from Brazil
LikeLike
Thank you! I’d be happy to send you the template. If you send me your email address through the ‘contact me’ page, I’ll send it over.
LikeLike
I love this so much! I’m planning to make this cosplay this year and I was wondering what size of the half sphere did you use? How did you attach it to the black head covering? Was that Velcroed directly to the half sphere? Oh! And what color of fabric did you use? I’m having trouble finding fabric that I’m pleased with!
I’ll probably email you for the staff template like previous commenters 😊😝
Thank you again for showing us how you made this amazing cosplay!! It’s fantastic!!
LikeLike
Thank you!
I used an 8inch hollow half styrofoam ball. It fit nicely right on top of my head. I then made a worbla mold of my head that fit inside the foam, and used the same brown fabric around the hair on the underside of the worbla. I might suggest putting some padding in there though too. The velcro (I think) is glued to that fabric. I sewed the other side of the velcro to the top of the black covering. I actually just bought a balaclava head covering on Amazon instead of making that part.
Which fabric are you looking for? I used a brown cotton for the hair wraps and a shiny burnt orange for the dress from joann.
Happy to send the plans!
LikeLike
hello can you send me the patterns for the magic wand
LikeLike
Only just discovered your page here and wanted to say how fantastic you look. Also thank you for your detailed walkthrough of your process. It’s very helpful.
I am currently working on a Rita cosplay for my mum and it’s so helpful!!
Also if you happen to still have your template for the wand and would be able to, can I kindly ask for a copy of it like many others have please?
LikeLike
hello can you send me the patterns for the magic wand
LikeLike
Did you end up getting the design template? I’m making one for 2026 C2E2 and me free handing it is def not the move.
LikeLike